Building Classilla on Mac OS X
What is Classilla

Browsing the modern Internet with old computers can be painful, but there is no shortage of awesome projects to achieve what would be considered impossible.
Cameron Kaiser and contributors have been working on Classilla, an updated release of Mozilla for Mac OS 8.6 and 9, from 2009 to 2021. Classilla is provided under the Mozilla Public License.
Context
Recently, a discussion on the amazing System 7 Today Forum was started by lauland, regarding the possibility of building firefox/mozilla/etc from source and possibly continue development, so I decided to give it a try on Mac OS X.
Picking up the excellent work started by lauland, I managed to build Classilla on OS X, and here’s how to do it.
What you’ll need
- A PowerPC Mac running Mac OS X 10.4.11
- A working Classic Environment
- Classilla (Macintosh Garden Page):
- Source code, Download #3
- Lauland’s MacOS Support (Download #7) and MacPerl with mods (Download #8)
- CodeWarrior Pro 7.1 (Macintosh Garden Page):
- CodeWarrior Pro 7.1
- CodeWarrior Pro 7.1 Reference - includes CodeWarrior MPW
- MacCVS Pro (Macintosh Garden Page)
CodeWarrior
Installation
- Install CodeWarrior 7.1 and Reference (which includes CodeWarrior MPW).
- Verify CodeWarrior MPW is in the root directory of your file system, if not, Copy the CodeWarrior MPW folder in the / directory from the Reference CD.
Configuration
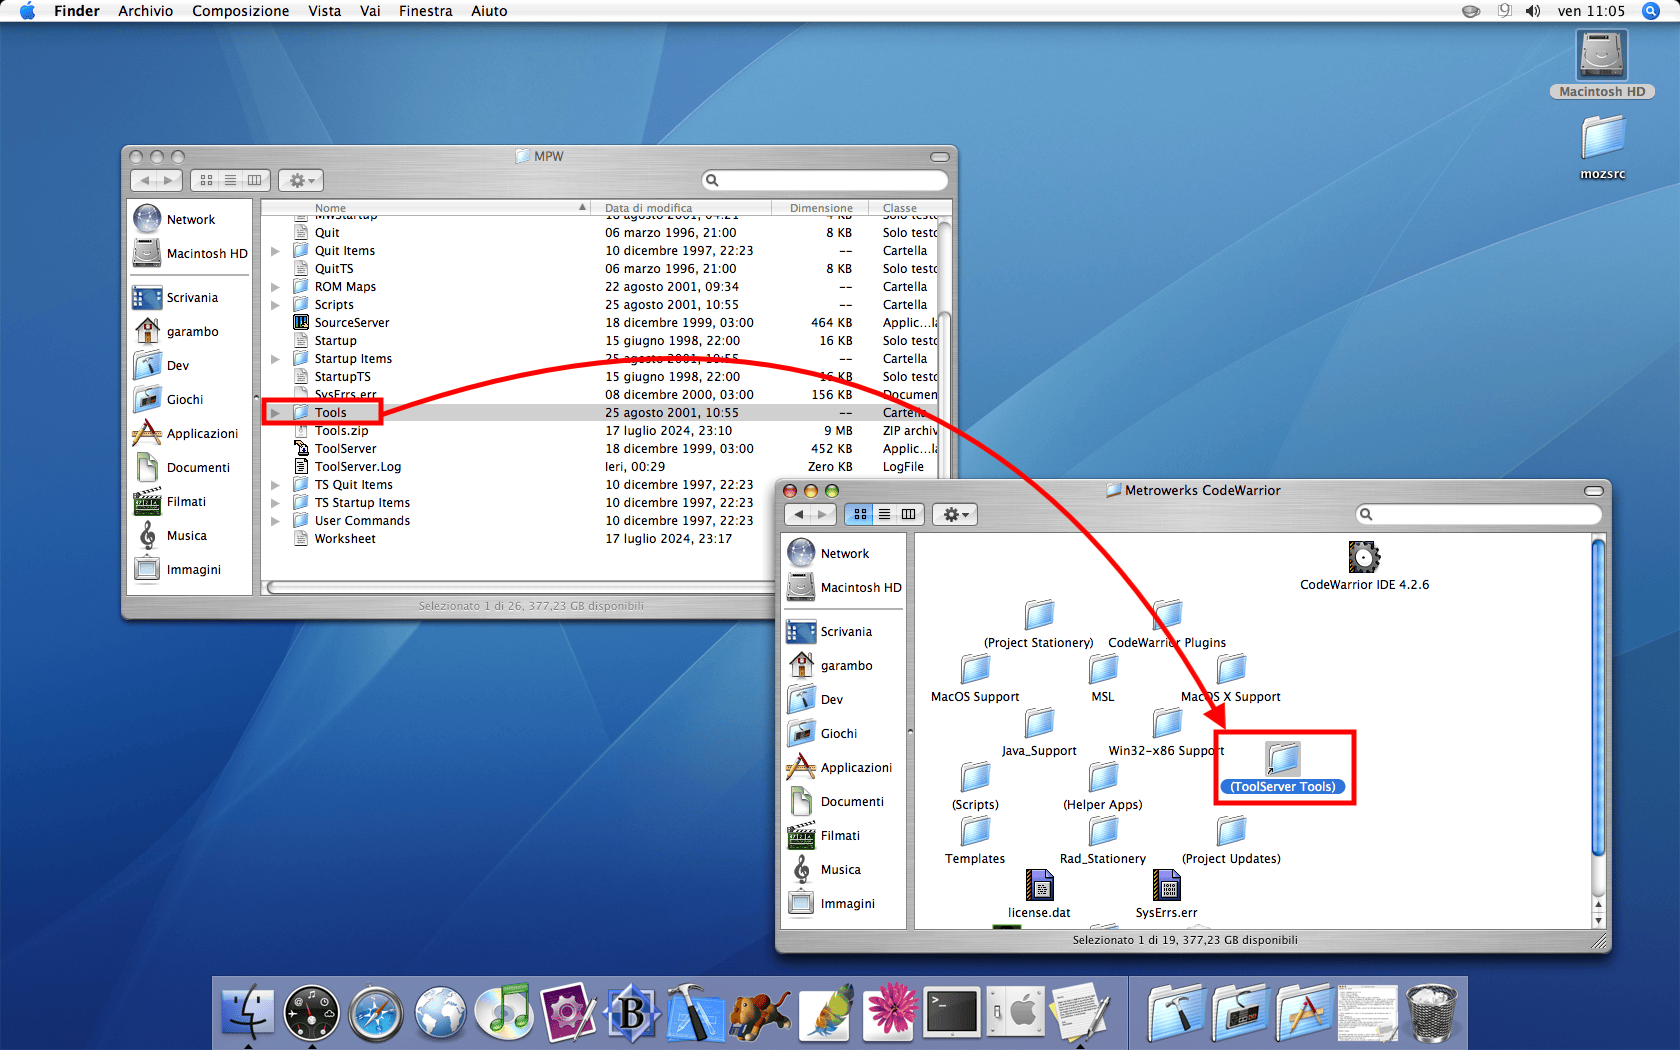
Create an alias of CodeWarrior MPW/MPW/Tools, rename it to (ToolServer Tools) and copy and replace it with the folder in the CodeWarrior folder (usually /Applications/Metrowerks CodeWarrior 7.0/MetroWerks CodeWarrior)
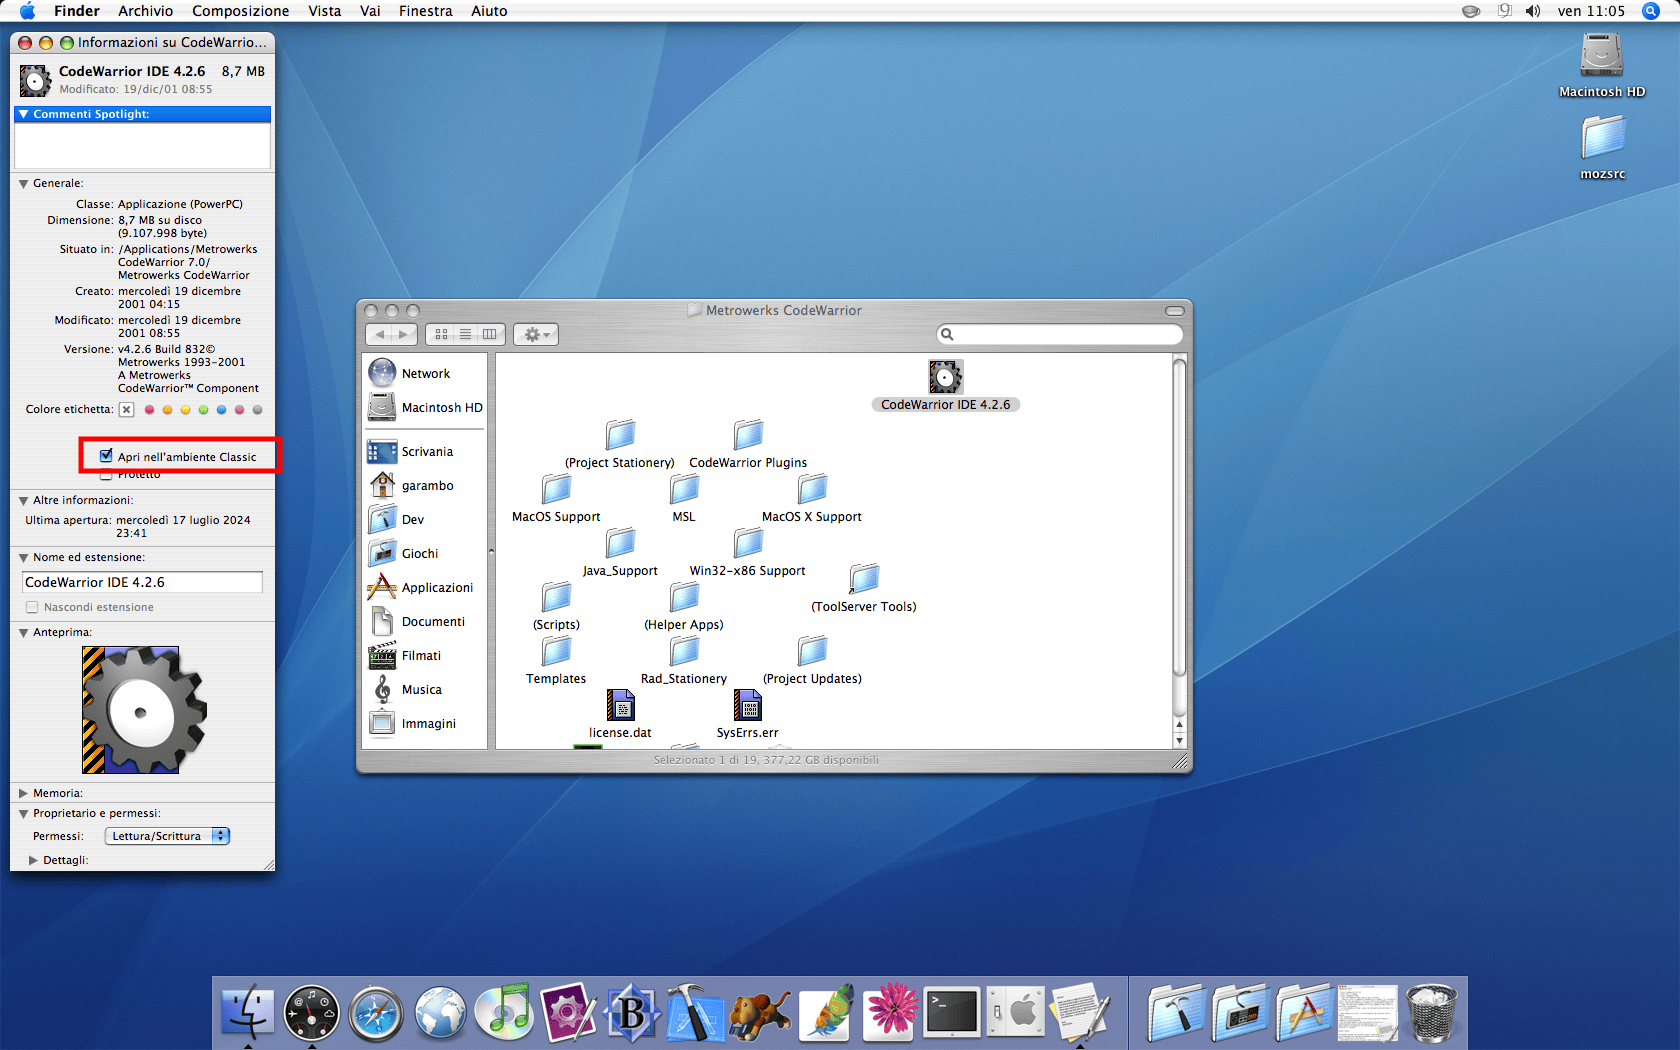
In the CodeWarrior Folder, select the IDE Application and force it to run in Classic.
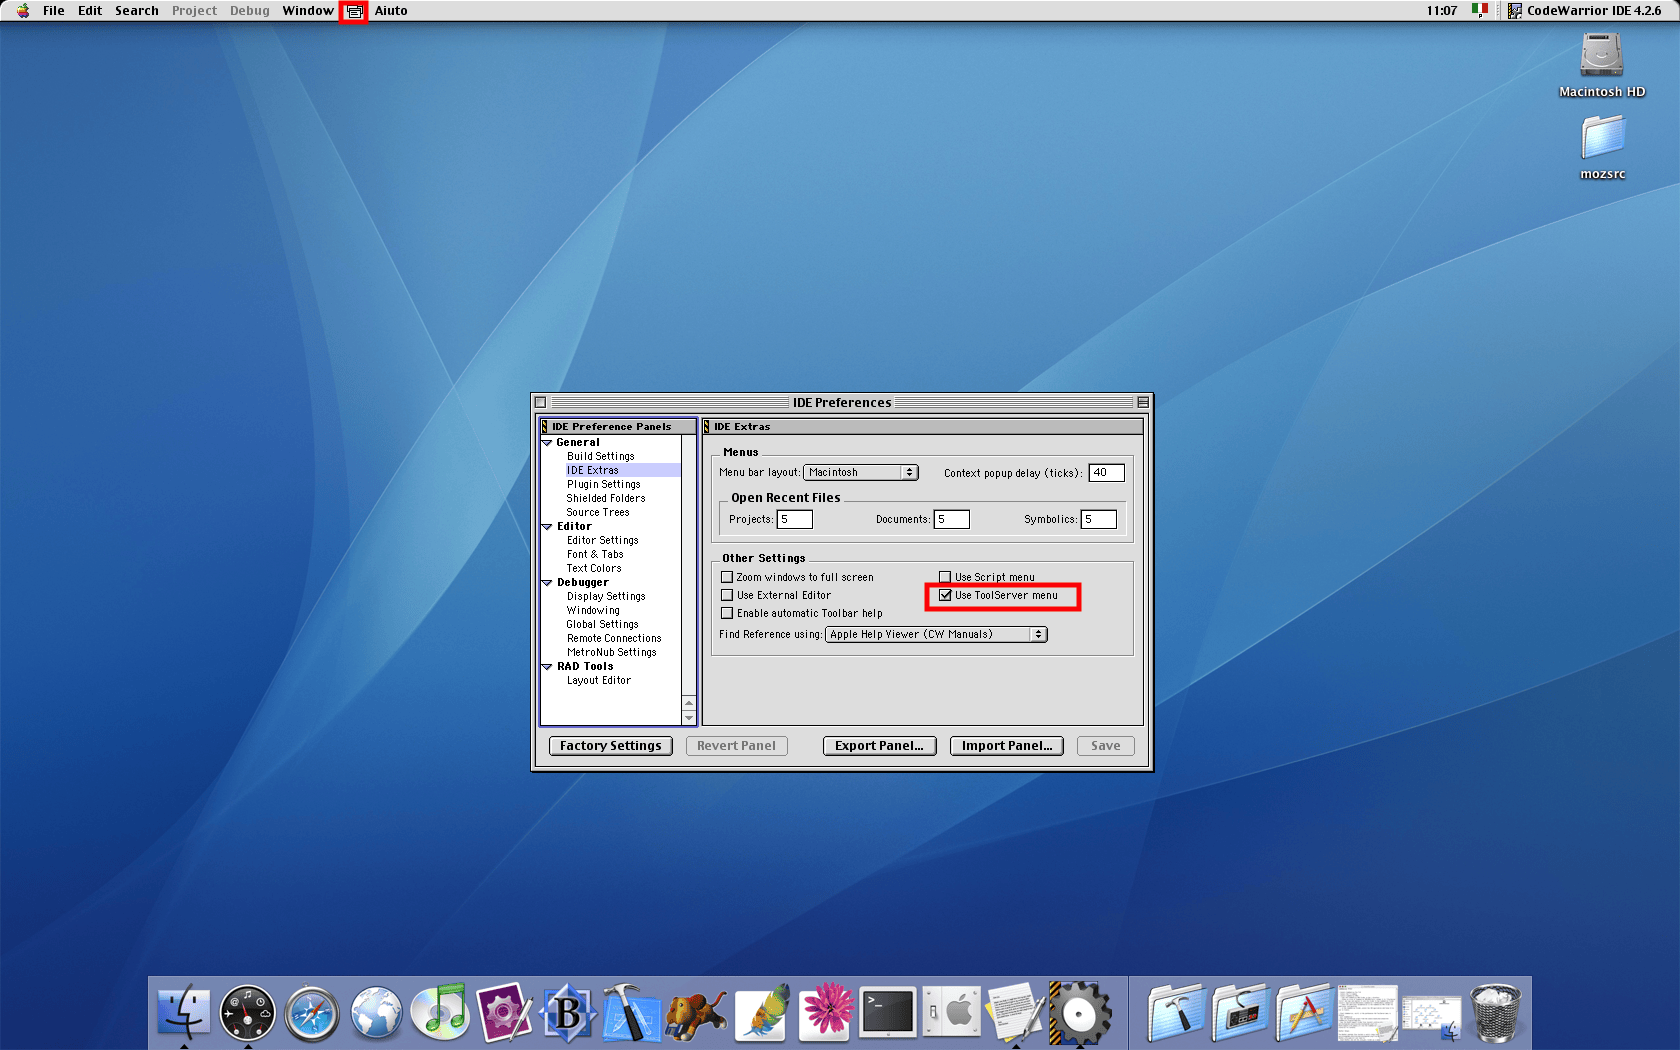
Start CodeWarrior, verify in the Preferences the ToolServer menu is enabled.
You can now quit CodeWarrior and complete the last two steps!
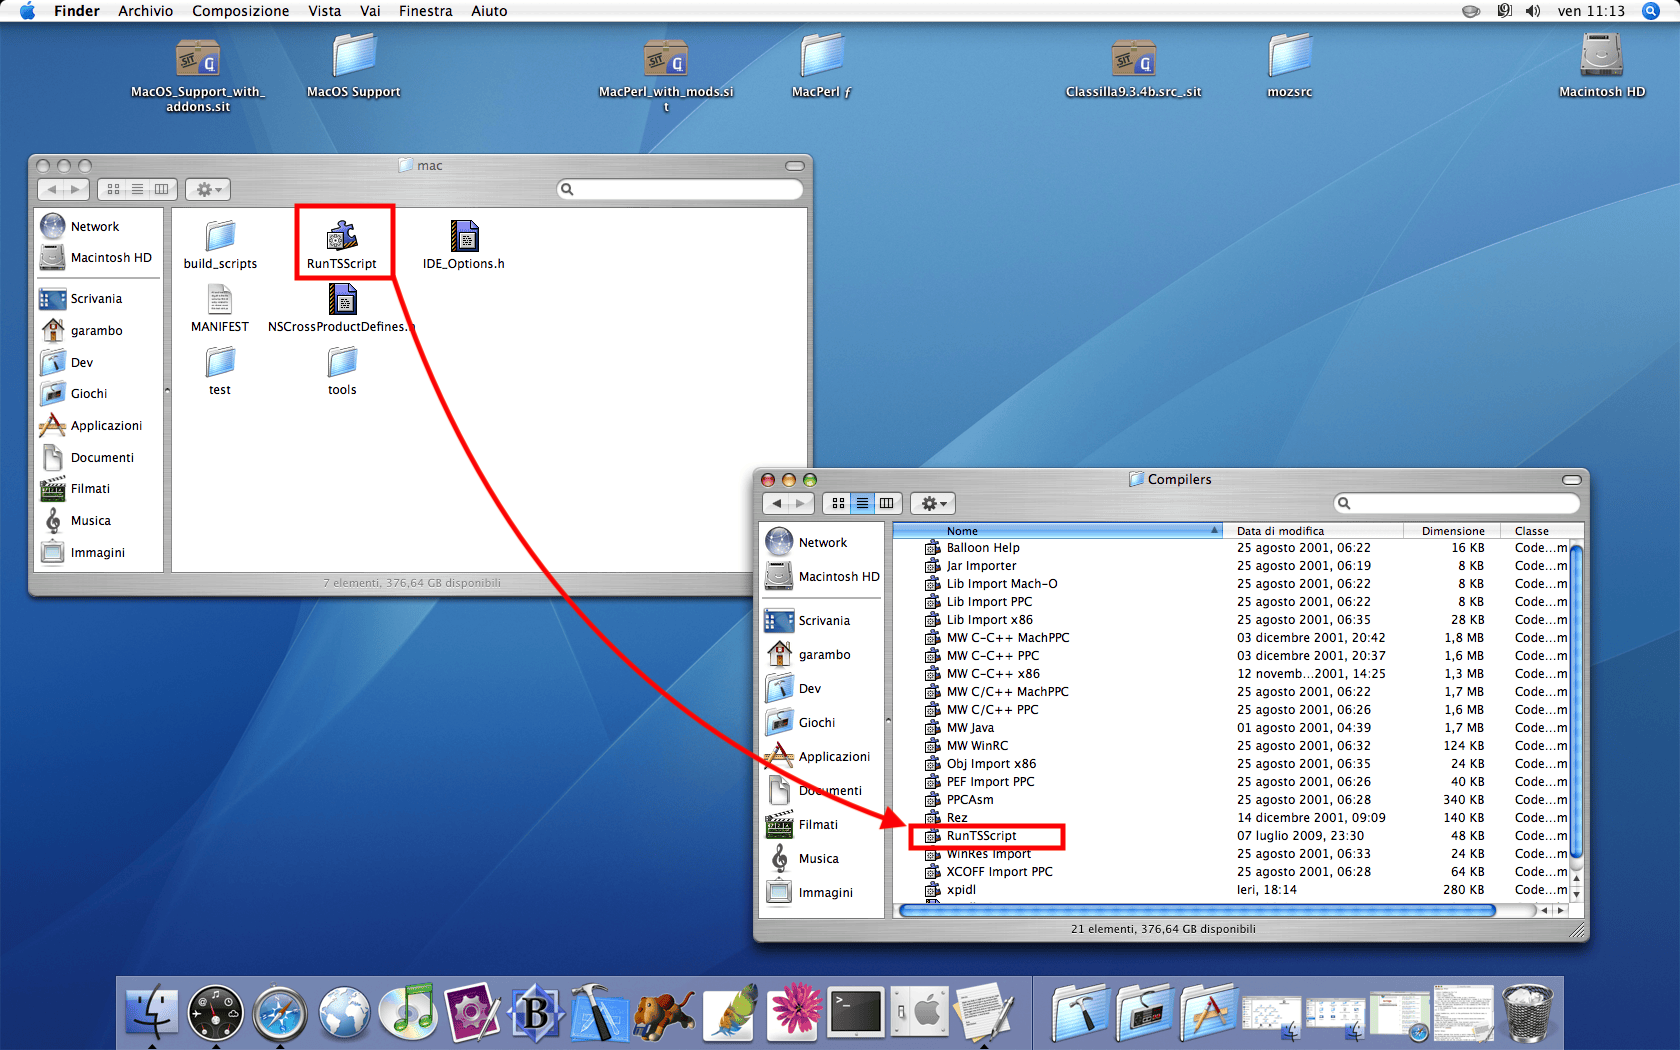
Copy the RunTSScript plugin from Classilla’s source: mozilla/build/mac/RunTSScript goes into /Applications/Metrowerks CodeWarrior 7.0/MetroWerks CodeWarrior/CodeWarrior Plugins/Compilers.
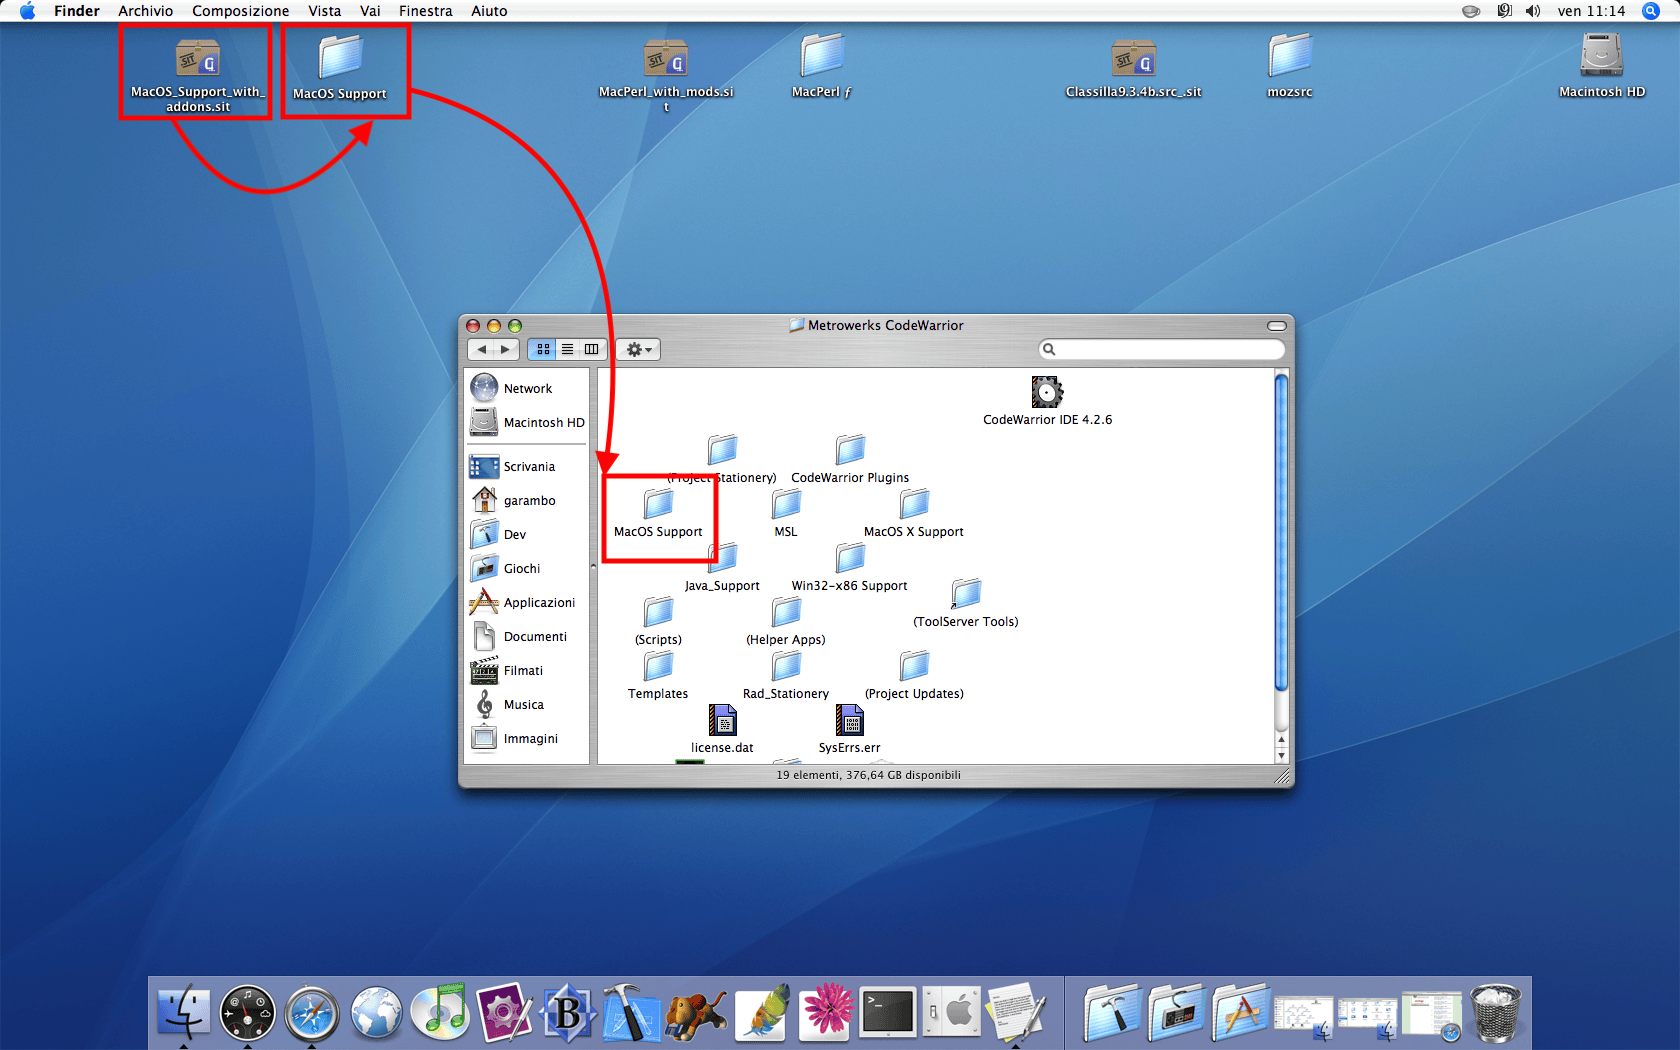
Copy the MacOS Support folder from lauland’s archive http://macintoshgarden.org/sites/macintoshgarden.org/files/apps/MacOS_Support_with_addons.sit into the CodeWarrior installation path (/Applications/Metrowerks CodeWarrior 7.0/MetroWerks CodeWarrior/) and overwrite its contents.
MacPerl
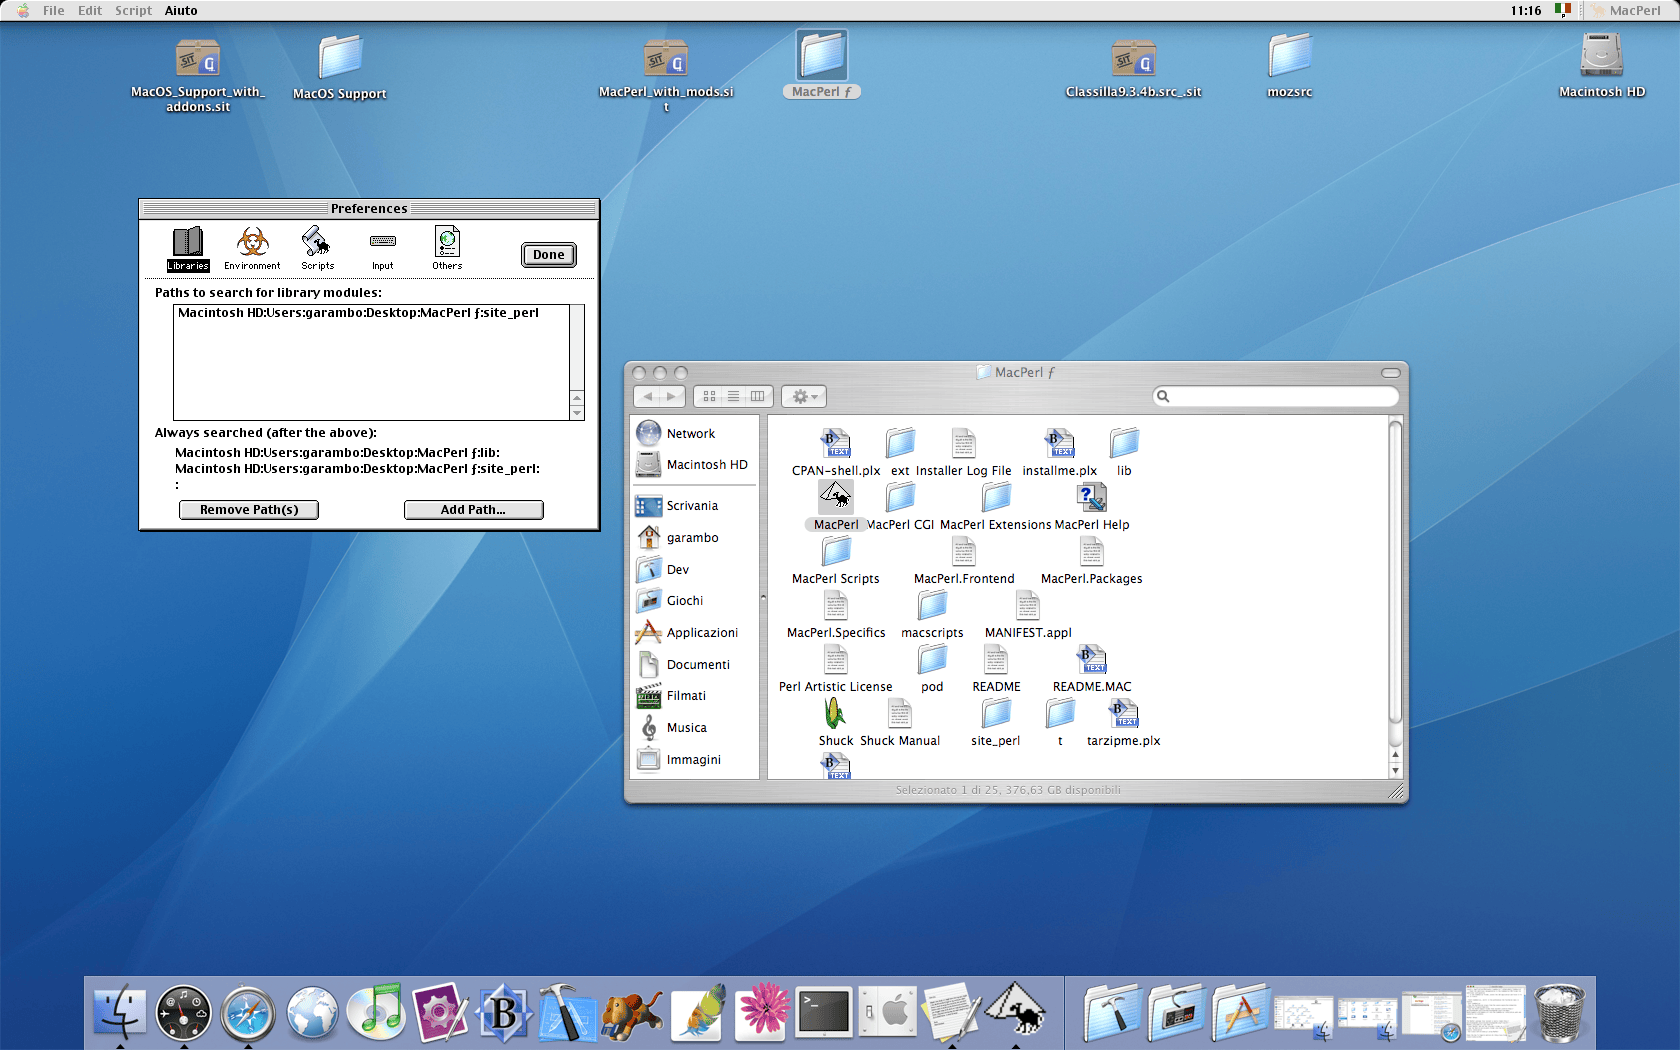
The MacPerl package from lauland is mostly ready, just un-stuff it.
Verify the site_perl folder is set as search path in MacPerl’s Preferences window.
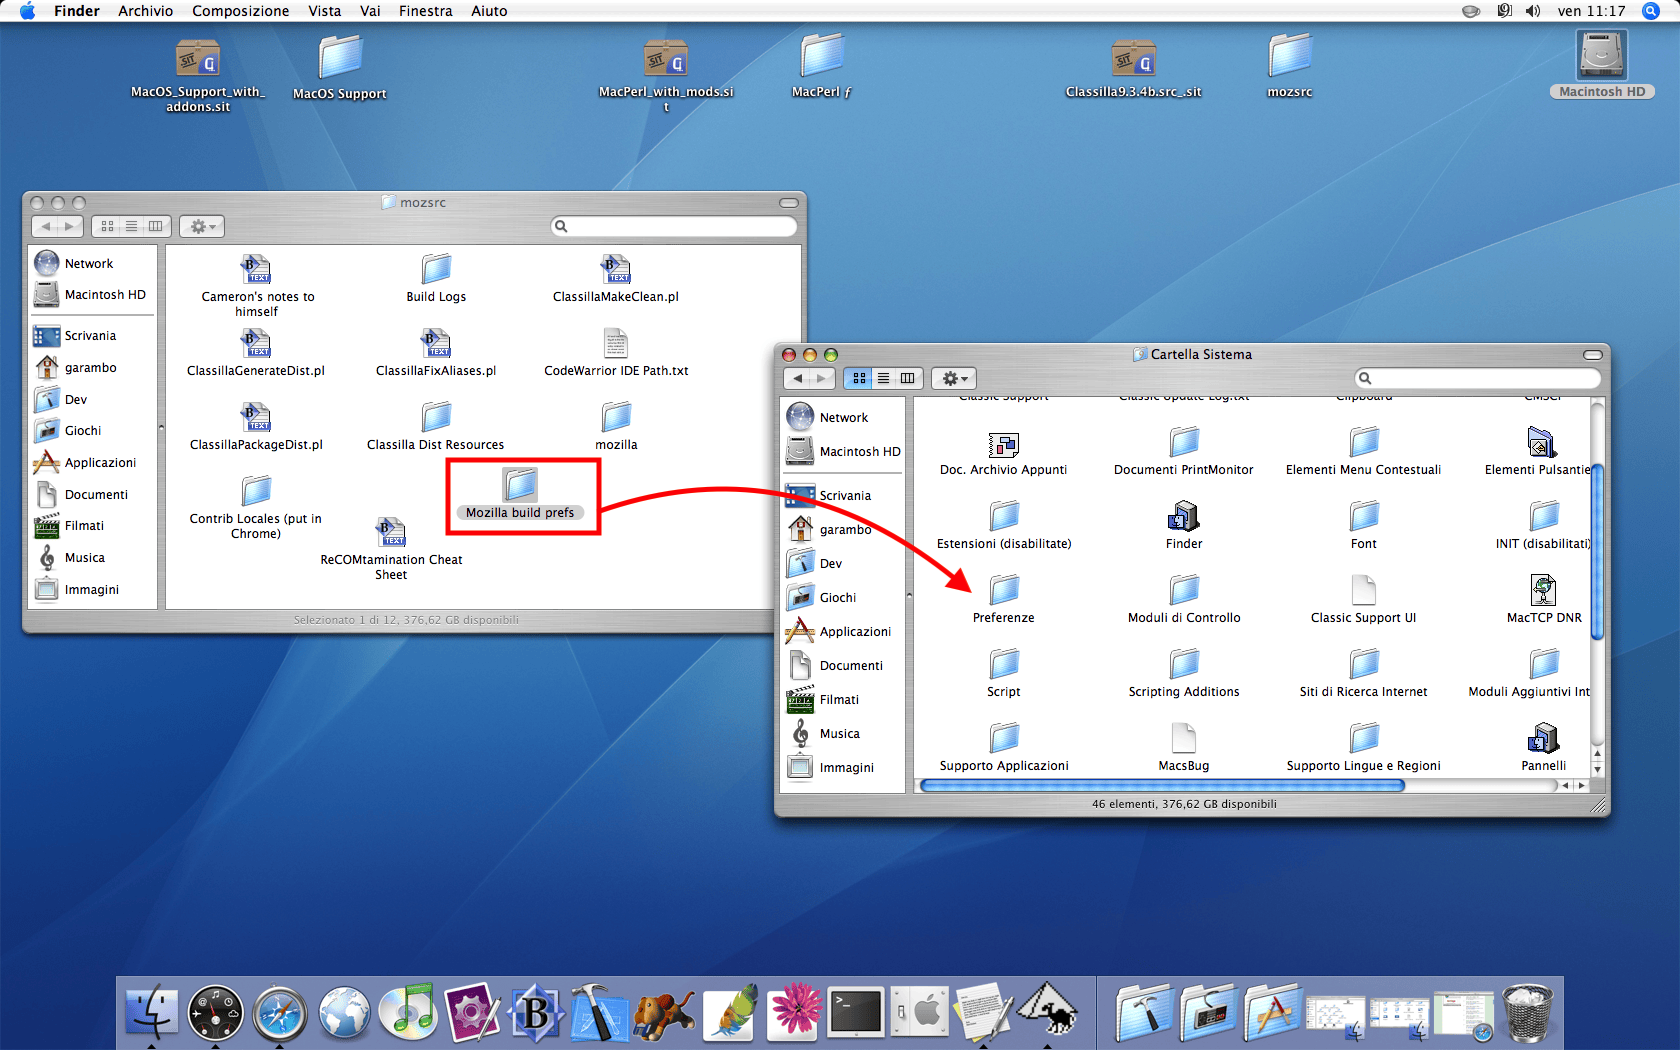
From the Classilla source folder, copy the Mozilla build prefs folder into your Classic environment’s System Folder/Preferences
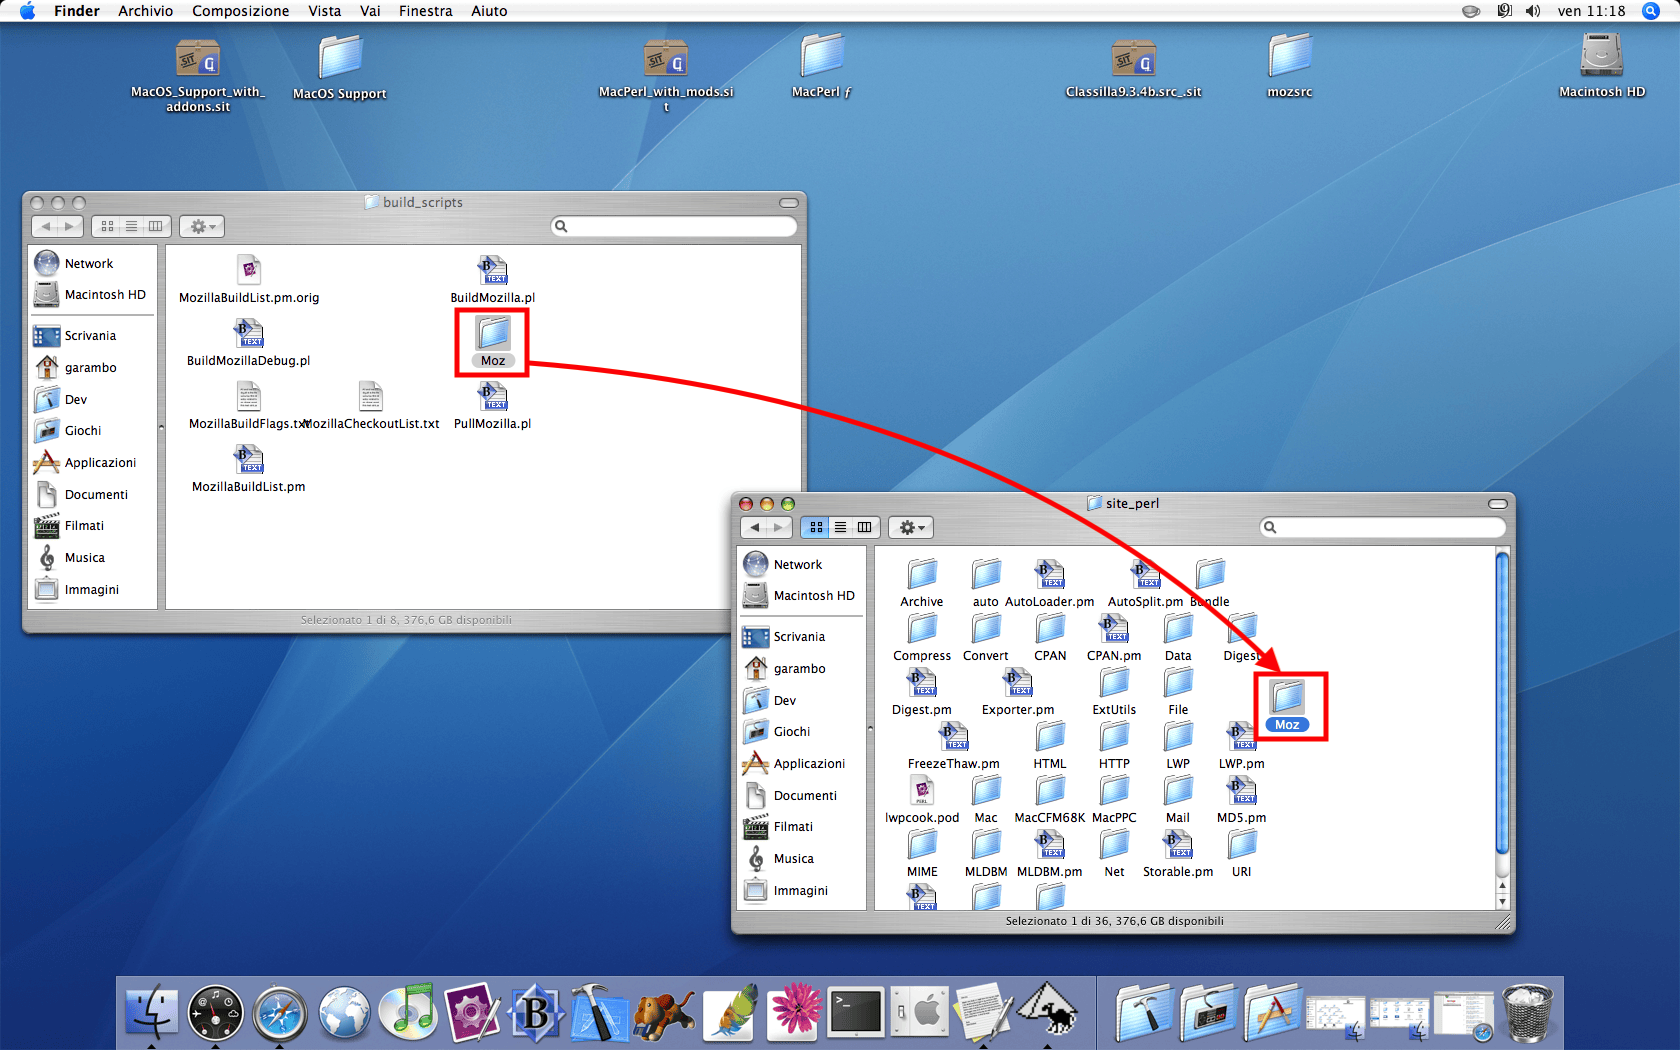
From the Classilla source folder, copy the Moz folder (mozilla/build/mac/build_scripts) there into site_perl
Now, you’re ready to run the first Perl Script!
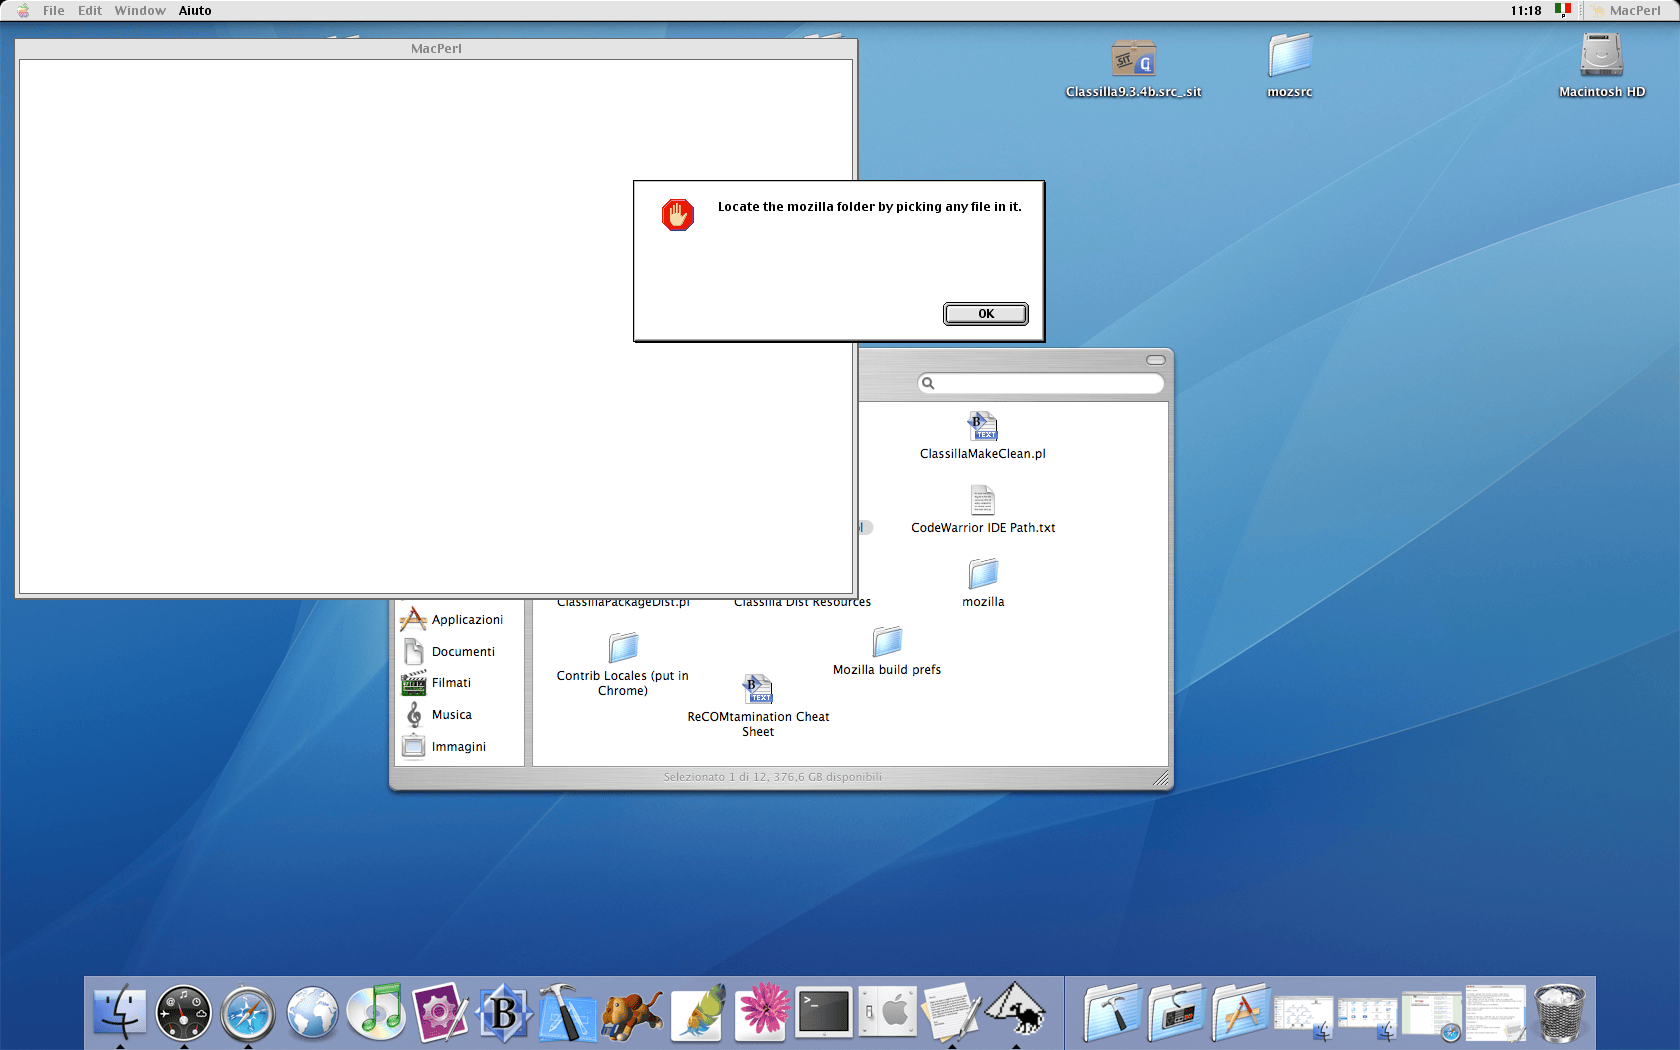
Simply drag the ClassillaFixAliases.pl script on the MacPerl icon on the dock (or open in as you please using MacPerl). You will be asked to locate the Classilla source code folder (named mozilla) by picking a file in it.
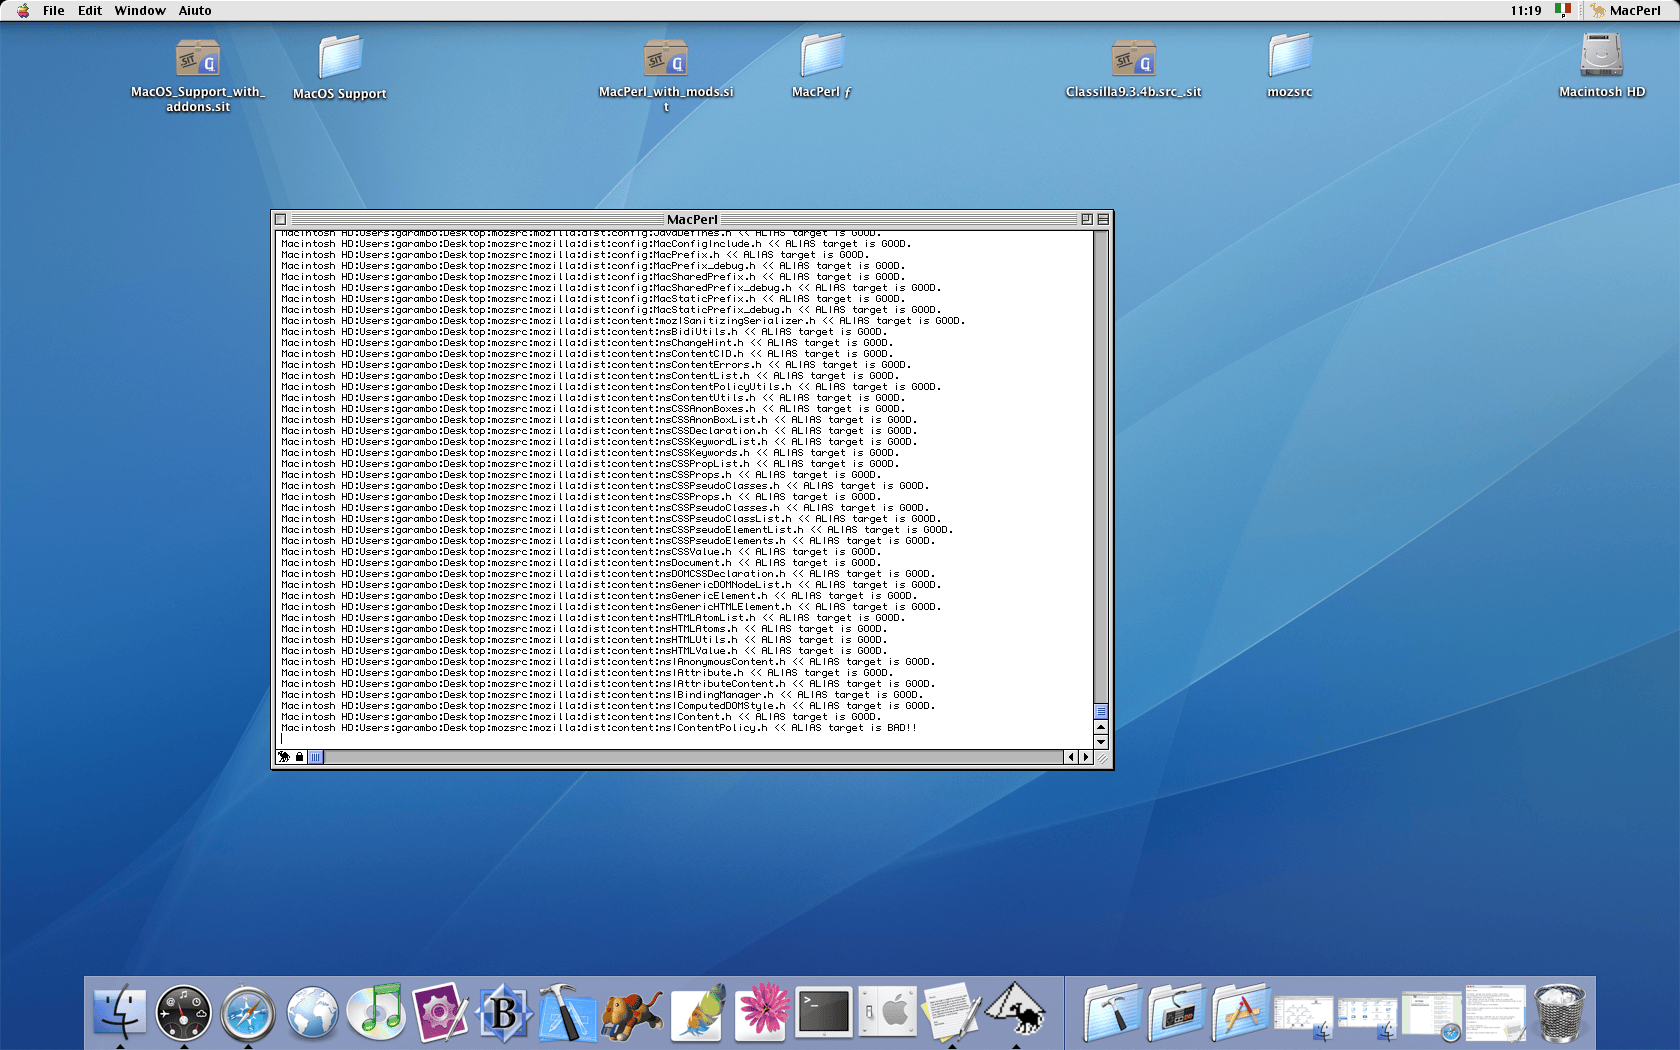
With the correct folder chosen, the script will run and complete in a couple of minutes (depending on your machine).
The fun part: building!
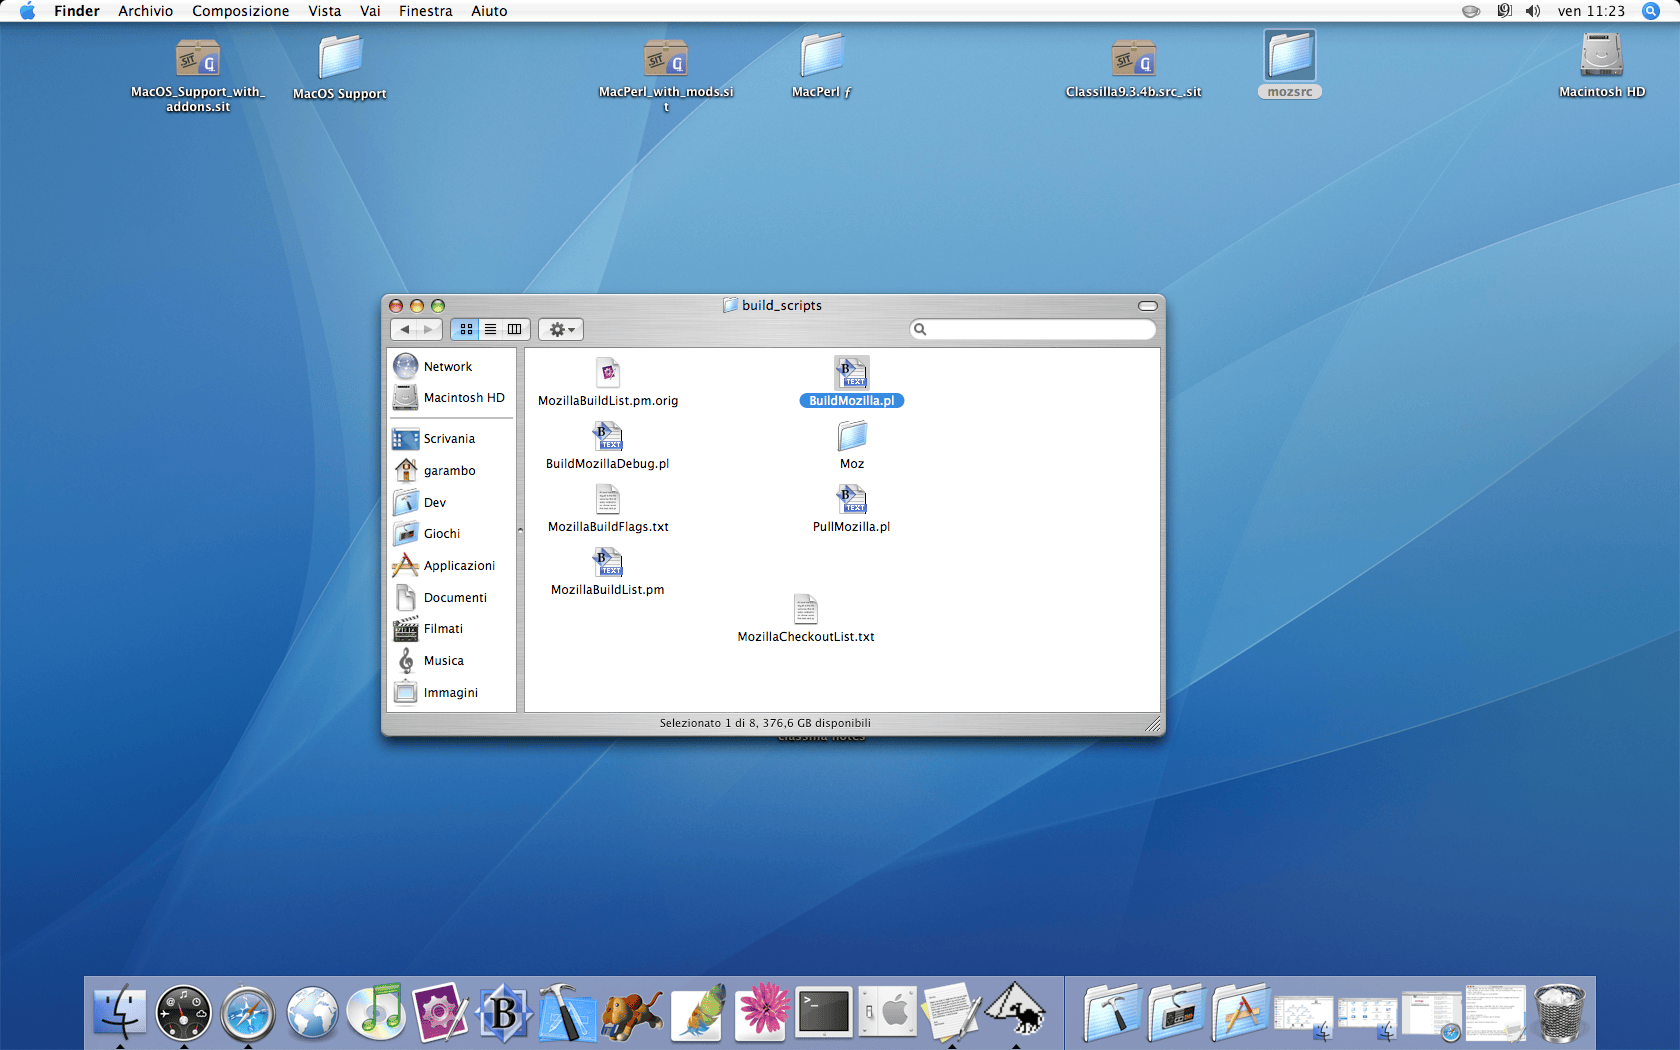
Everything is mostly ready. The main build script, BuildMozilla.pl is located in the Classilla Source folder under mozilla/build/mac/build_scripts.
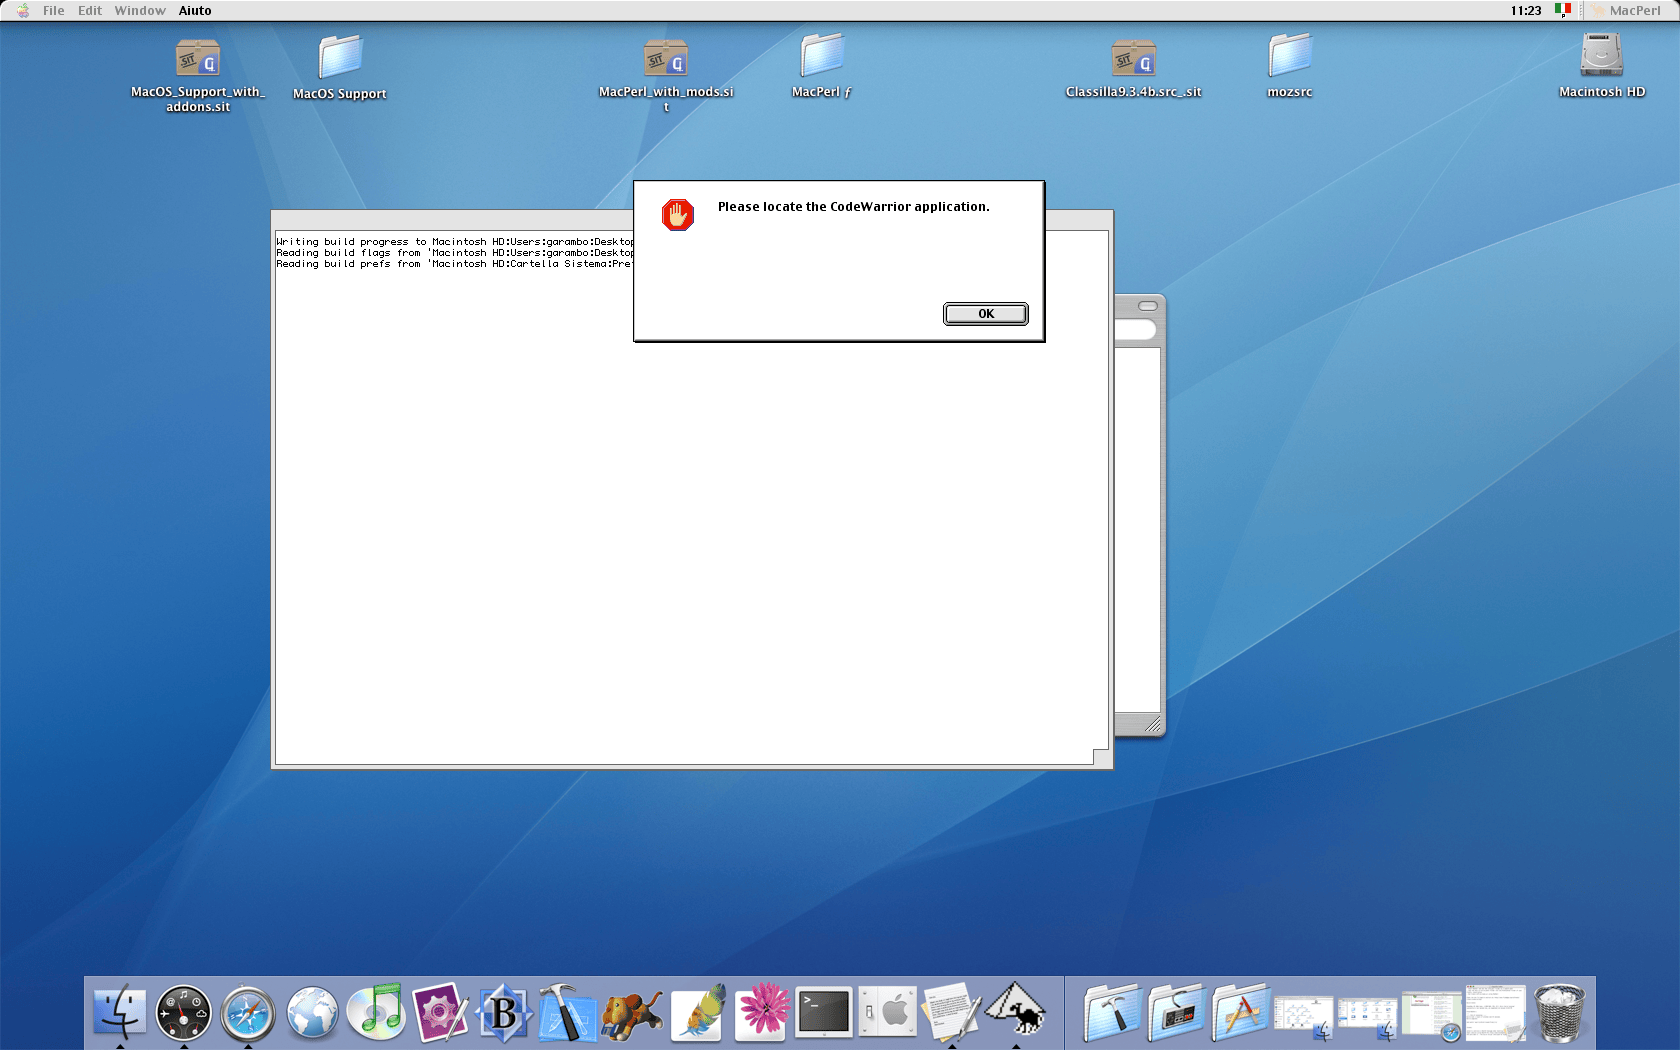
Simply drag the BuildMozilla.pl script on the MacPerl icon on the dock. You will be asked to locate your CodeWarrior IDE application. Use the Picker to locate it, in my case inside the /Applications/Metrowerks CodeWarrior 7.0/MetroWerks CodeWarrior/ folder.
The original build script relies on a MacCVS session to pull the latest changes:
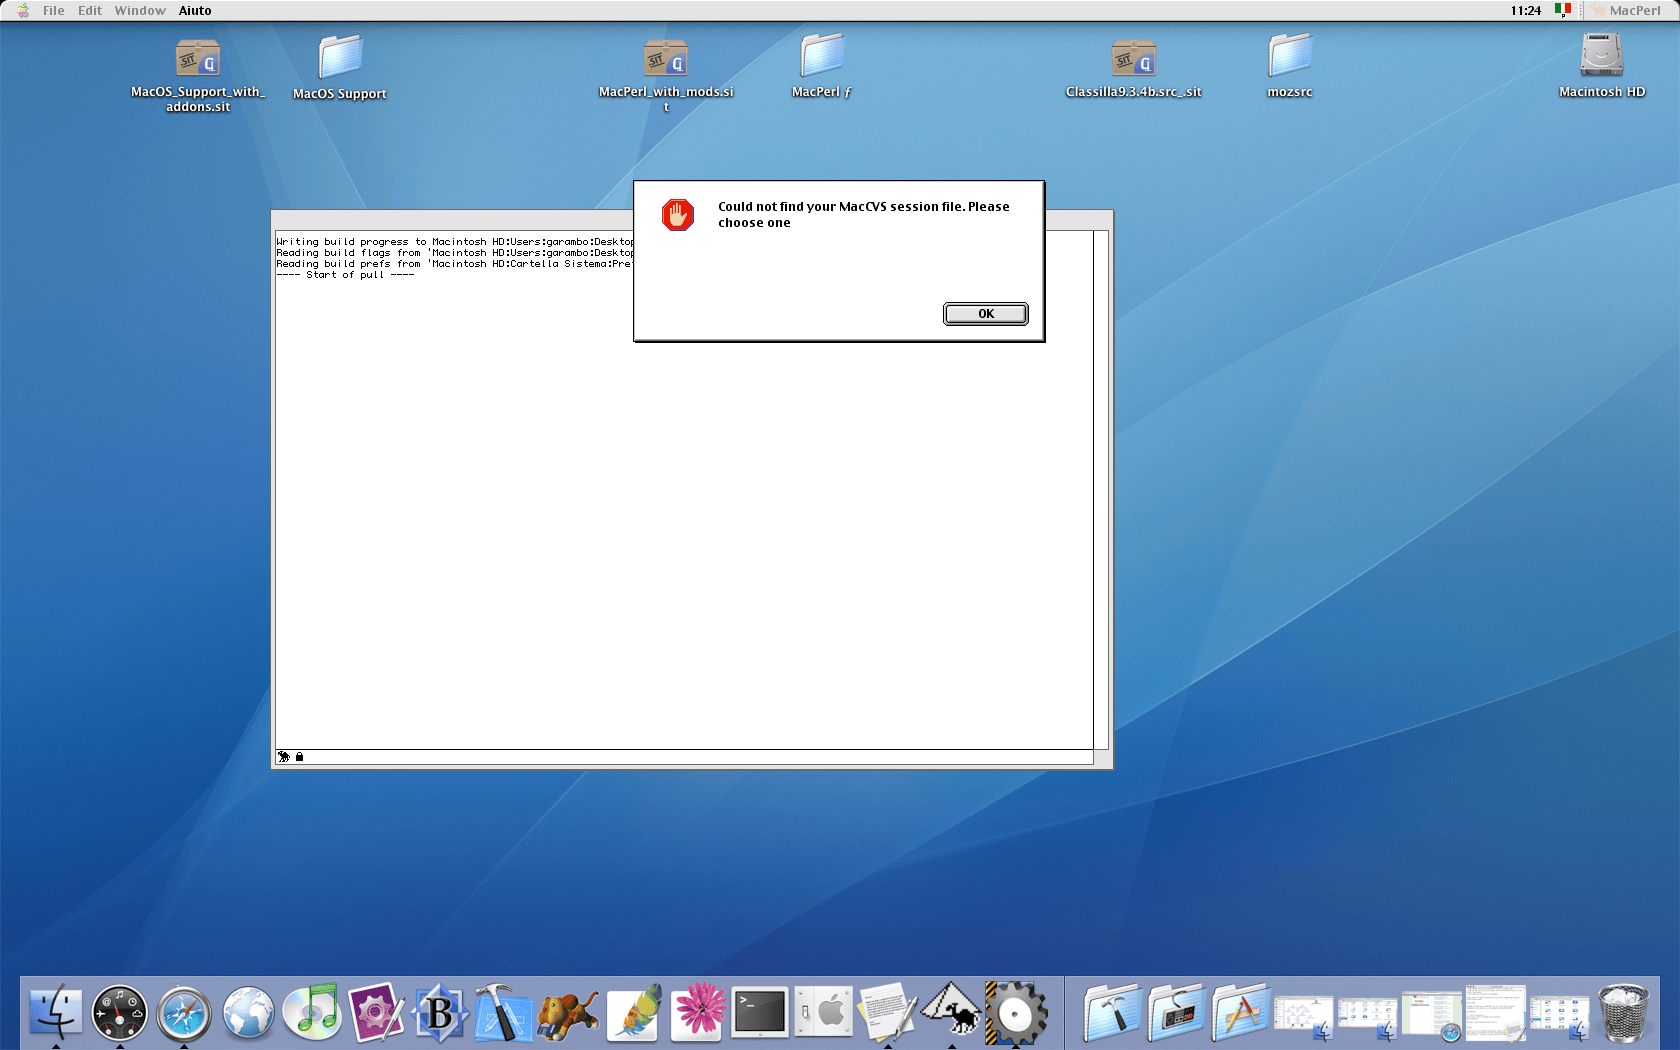
The pull is done as part of the build action in the RunBuild subroutine (called by BuildMozilla.pl):
PullFromCVS($input_files->{"checkoutdata"}, $input_files->{"checkouttime"}) calls CheckoutModules and causes the build to fail if no CVS session is provided.
Not choosing a Session file, even an empty one will result in a build failure.
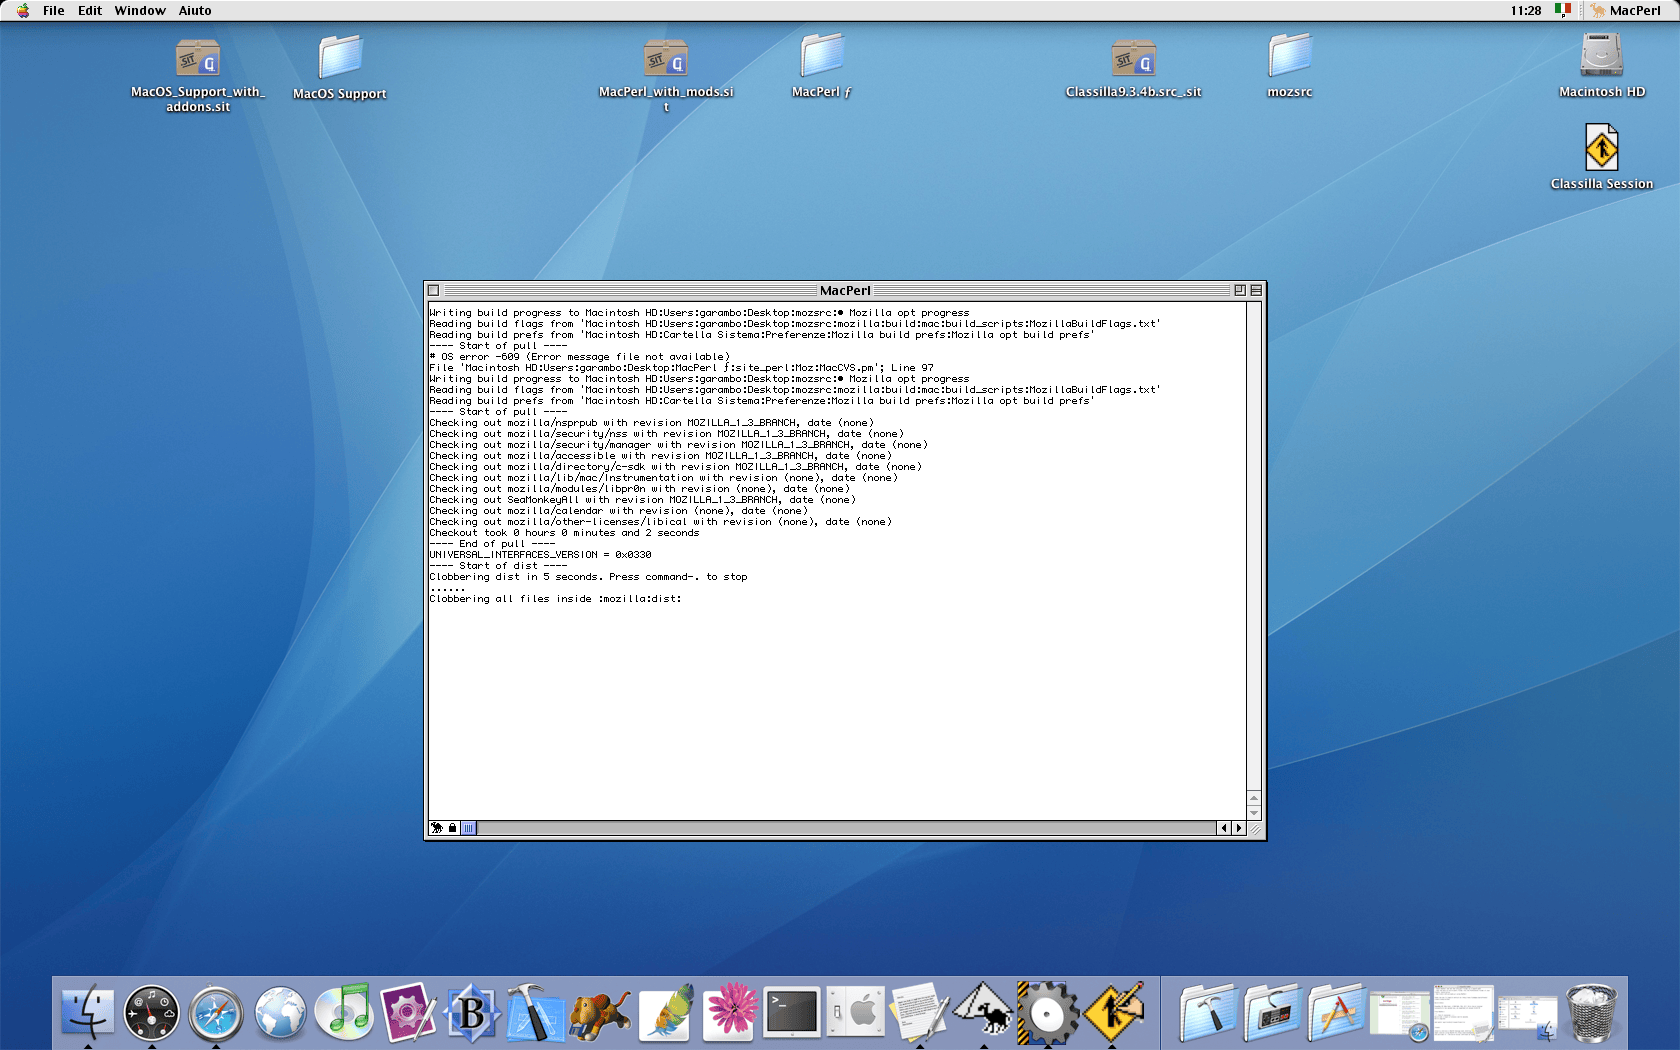
---- Start of pull ----
MacCVS->new cvs file <  > does not exist
# Error: Checkout aborted. Cannot create session file: .
File 'Macintosh HD:Applications (Mac OS 9):MacPerl ƒ:site_perl:Moz:BuildCore.pm'; Line 402
To solve the issue, using MacCVS Pro, create a new Session file: in this example, I created a Session named Classilla Session on my Desktop folder.
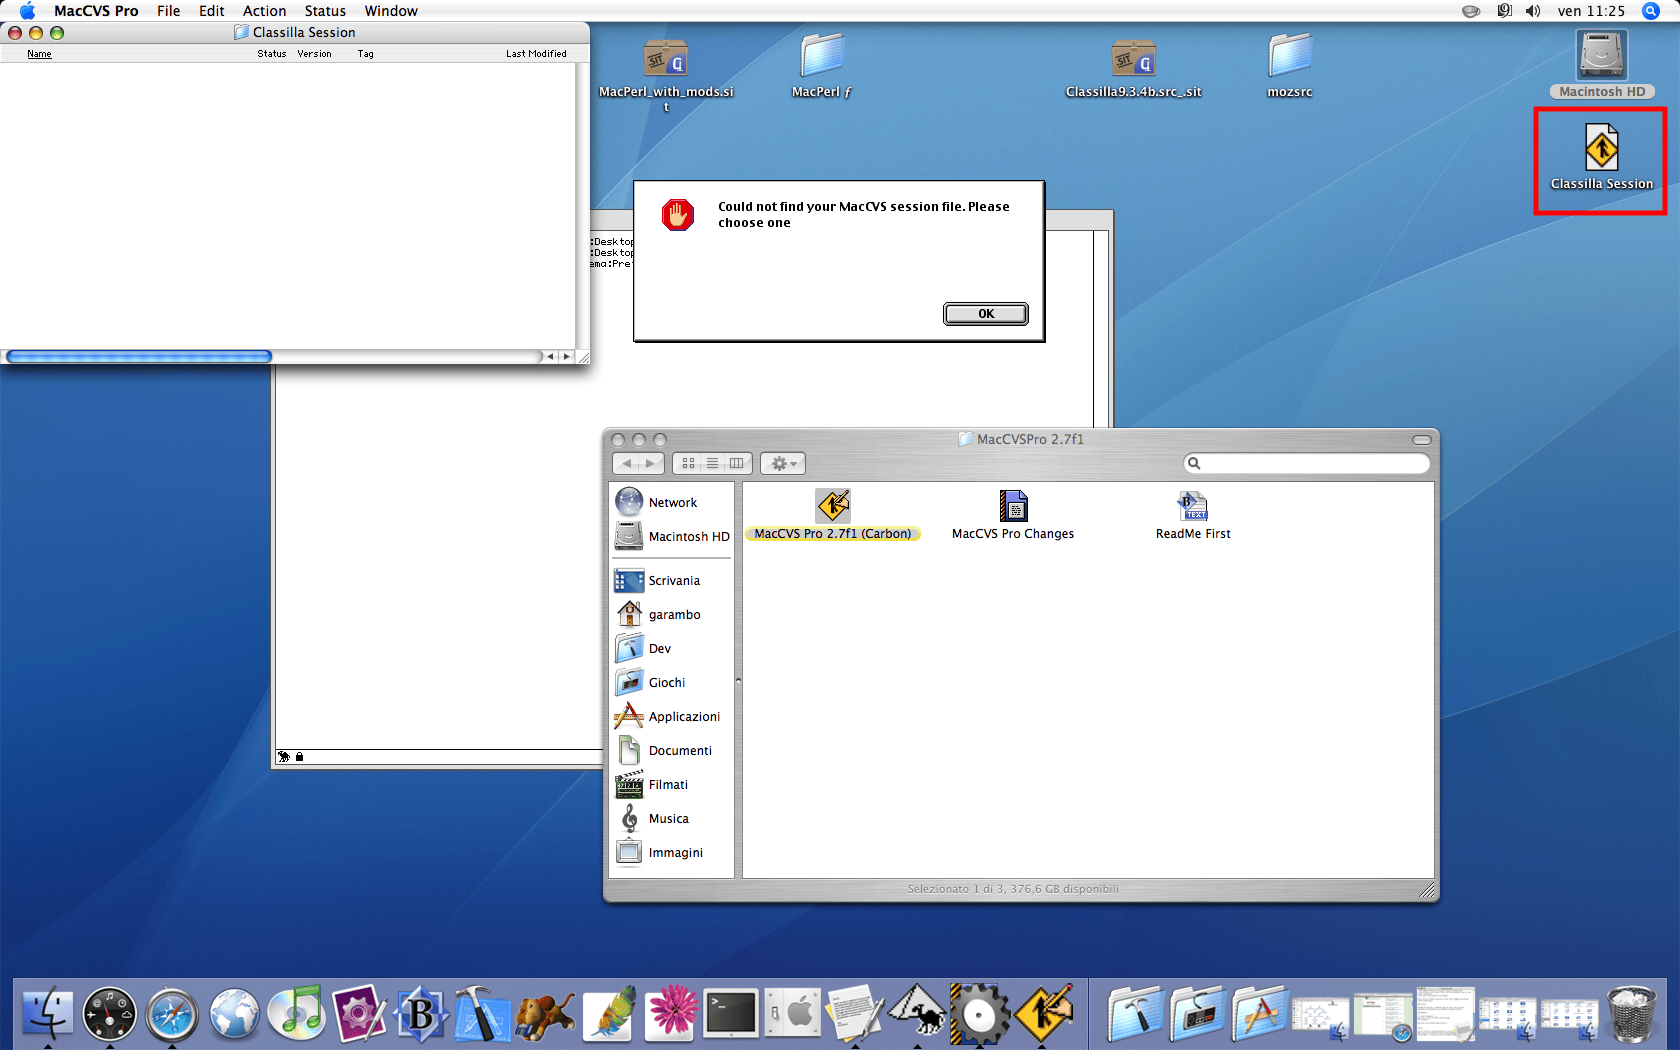
Pick the newly create Session file and the build will continue.
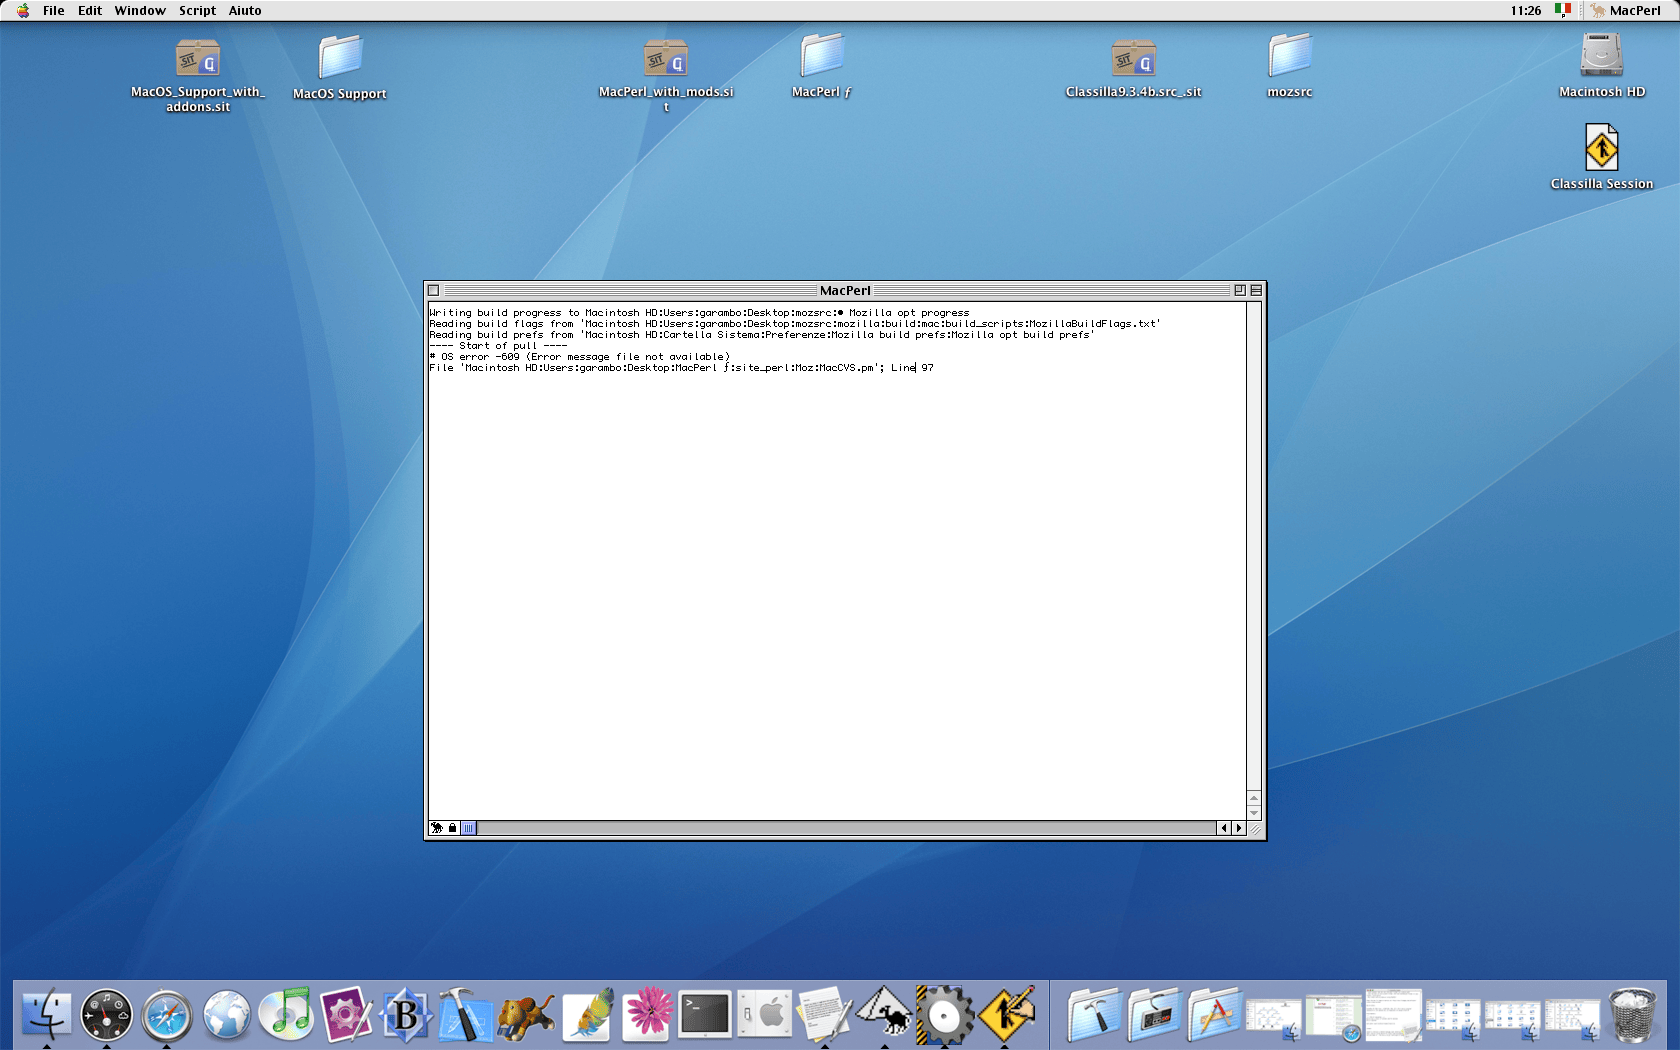
But wait! There might be something more!
--- Start of pull ---
#OS error -609 (Error message file not available)
File 'Macintosh HU:Users:garambo:Desktop:MacPerl fisite_perl:Moz:MacCvS.pm; Line 97
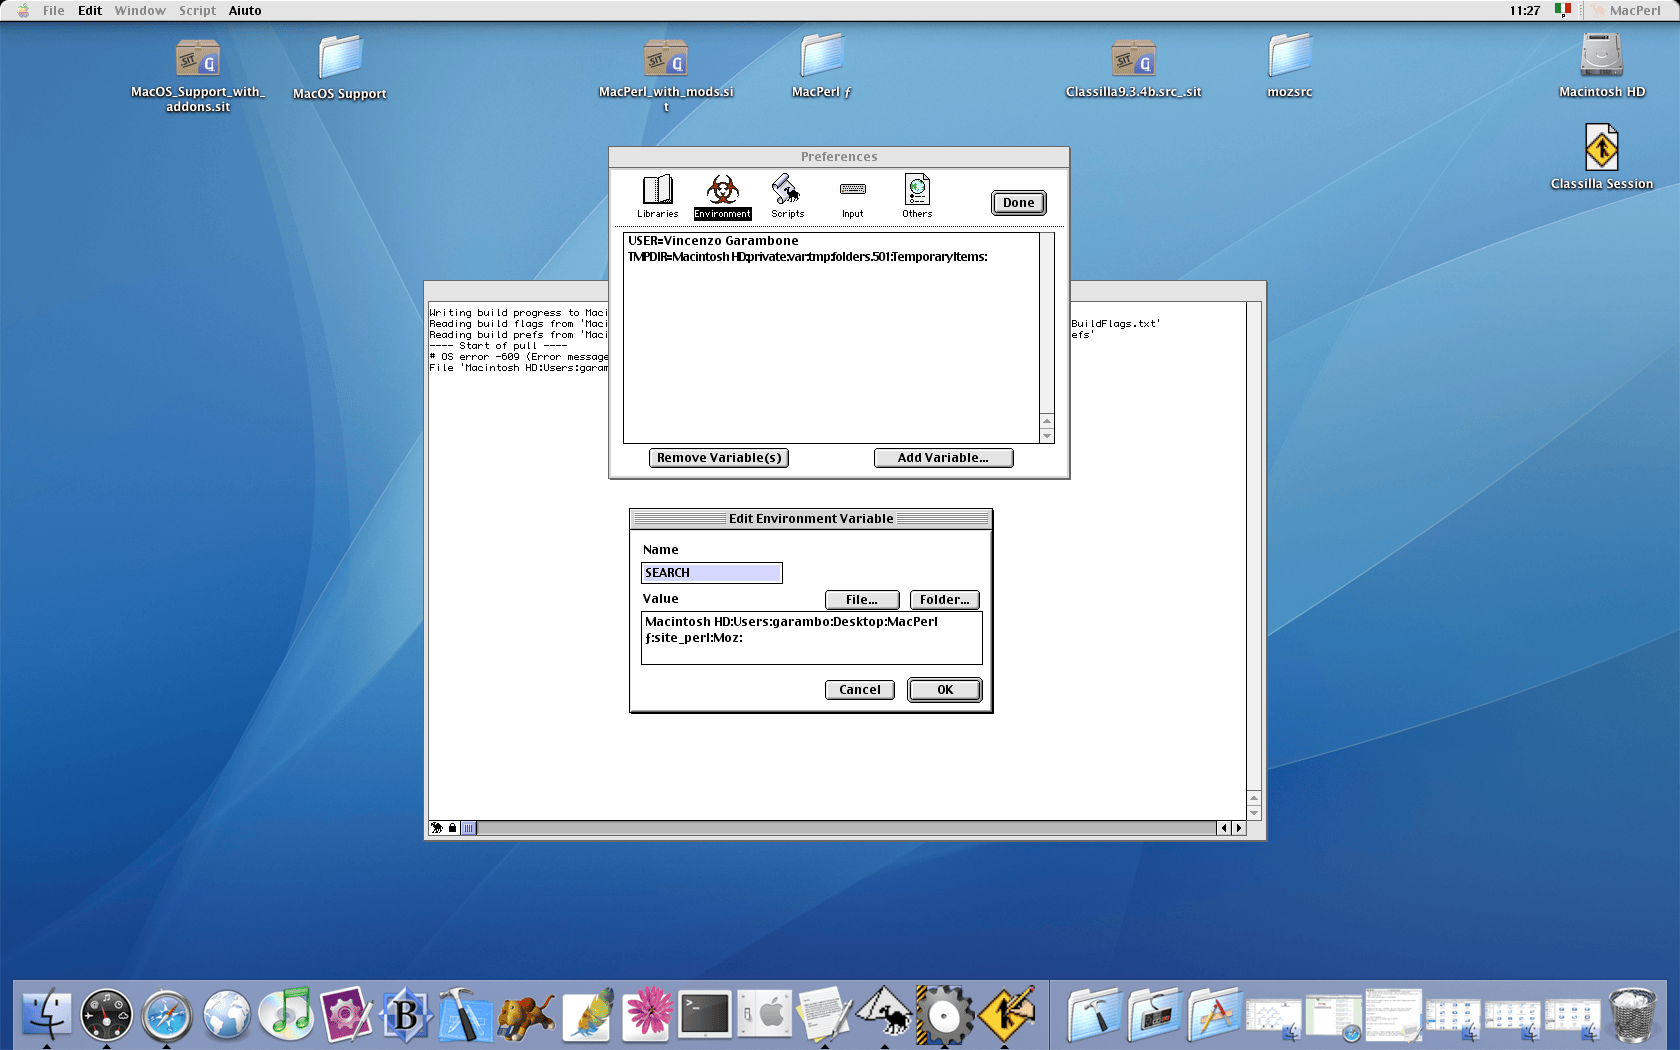
We will need to add the site_perl/Moz path to MacPerl’s Environment variabiles: in order to that, open MacPerl’s Preferences window, select the Environment tab and add a new variable named SEARCH pointing to the Moz directory we copied earlier.
Restart the build by dragging the BuildMozilla.pl script on the MacPerl icon on the dock. The script will move past the previously failed step.
Once the first step (the Manifest stage) is complete, the build script will move to the compilation of the xpidl tools, if everything was correctly configured, CodeWarrior will start.
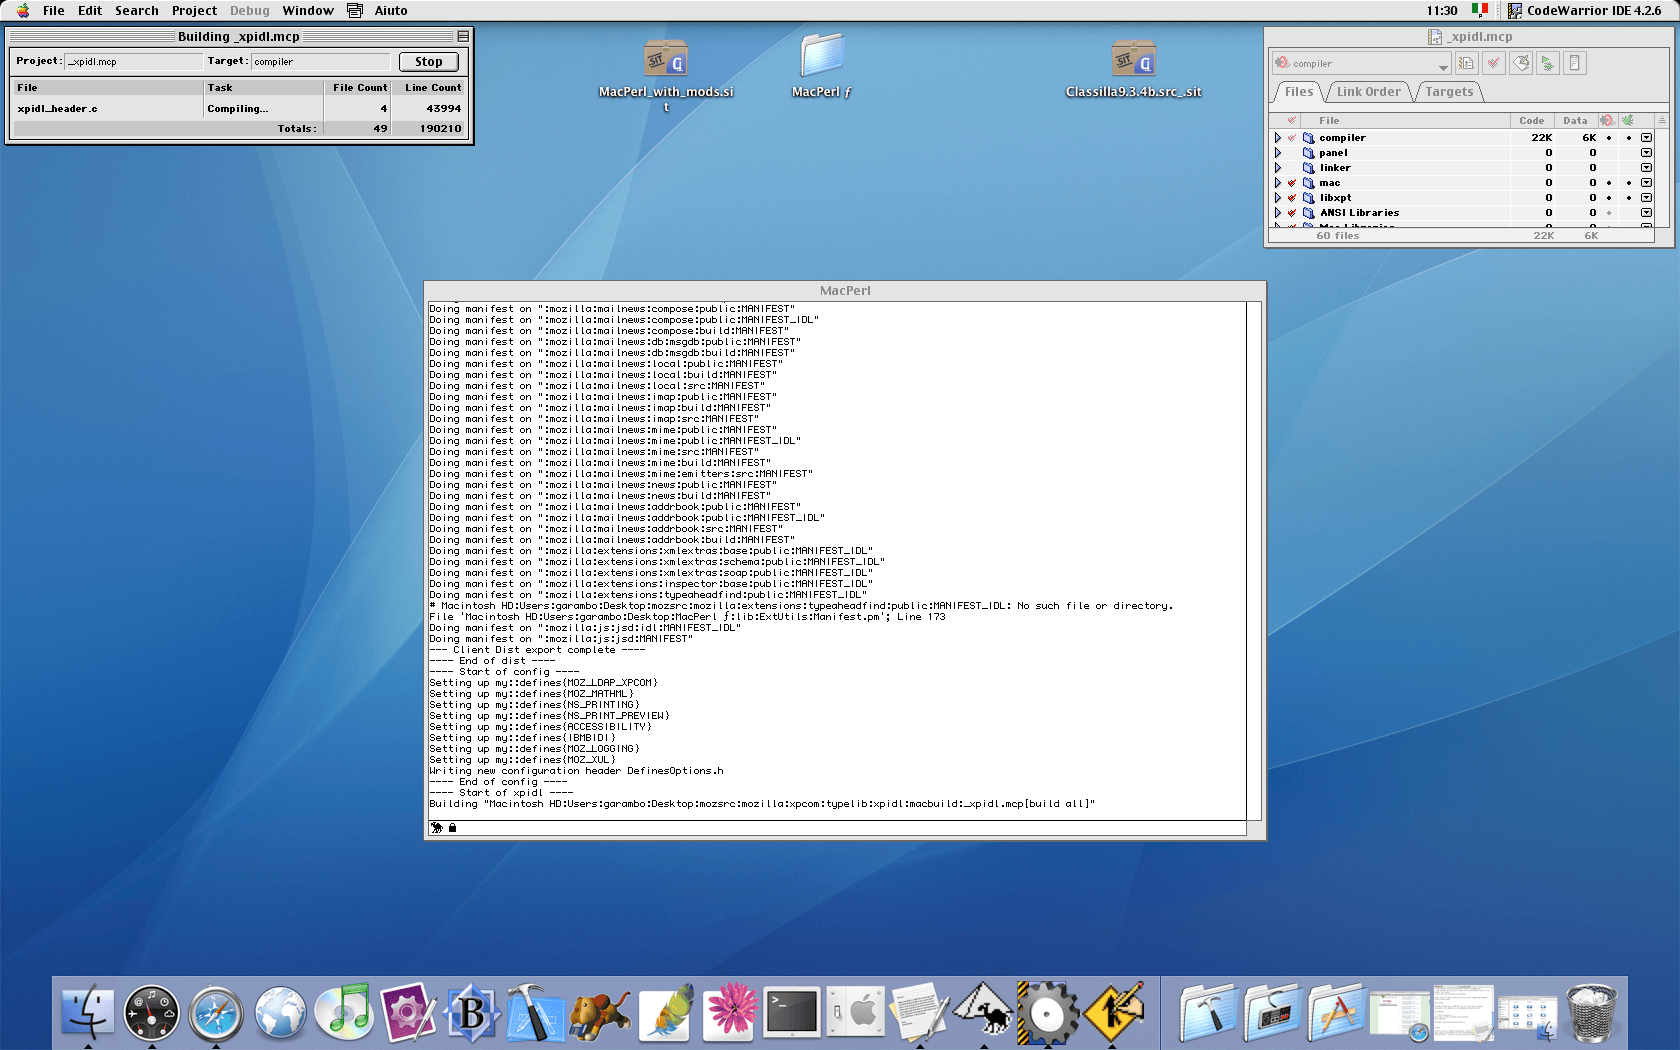
As mentioned in the original build instructions, if this is the first time running a build, this step will likely fail:
The very first time you try to do a build, it will die after this point because CodeWarrior won't register the tool without a restart.
Quit CodeWarrior and MacPerl, then restart the build script. You should never see this again.
If you can't get past this point, your CodeWarrior is not set up right and you should go through the directions above again to figure out why.
As suggested, quit both CodeWarrior and MacPerl and restart the build by dragging the BuildMozilla.pl script on the MacPerl icon on the dock. if everything was configured correctly, the script will be able to complete the xpidl tools compilation step and continue.
Now, it’s time to go grab a coffee, or maybe lunch! :) The build script automates the compilation of all of Classilla’s compontents using CodeWarrior in the background. My Dual Core Power Mac G5 (2.5GB RAM, SSD) took around 1 hour and 15 minutes to complete the build, so results may vary.
And done!
A successfull build script run will end with something like:
---- End of resources ----
Build took 1 hours 15 minutes and 44 seconds
Build complete
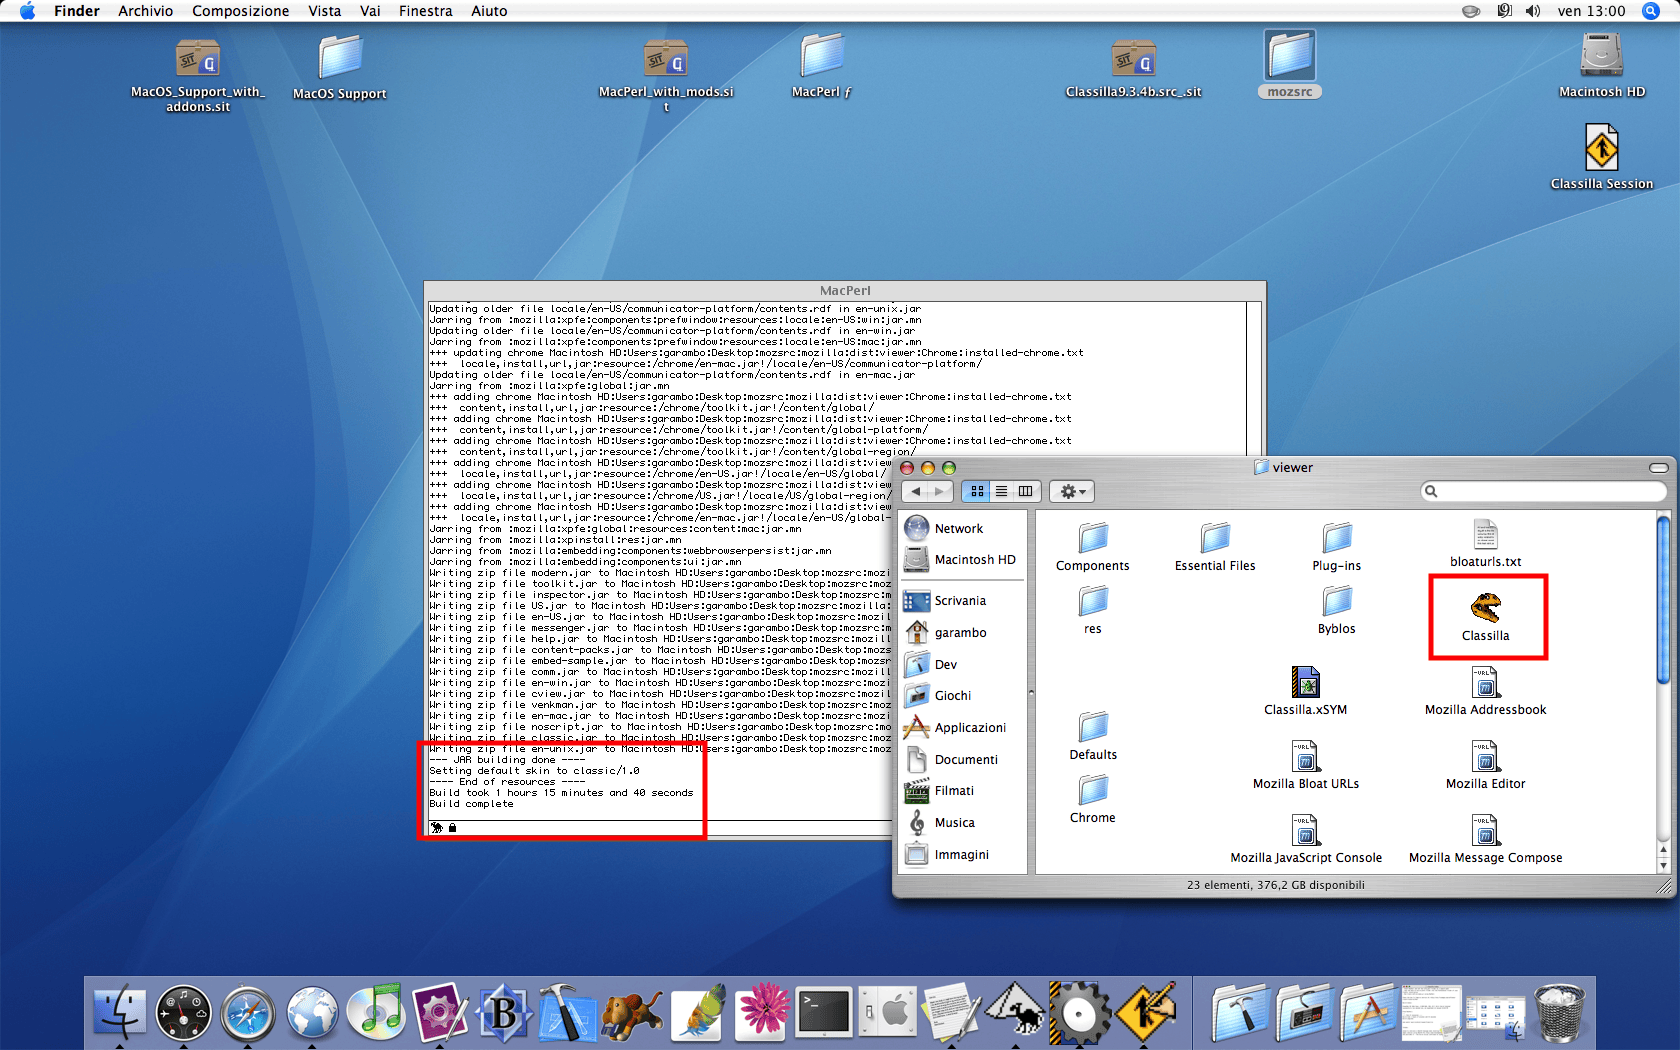
You will find your build in mozilla/dist/viewer.
References
- Original build instructions